In the world of event marketing, the custom roll-up banners workflow guides everything from concept to display banners, ensuring branding, design, and production align for a cohesive and compelling presence that stands out in crowded venues. The journey begins with a solid brief and moves through the roll-up banner design process, the custom banner printing steps, and careful color management to deliver a print-ready result with color fidelity, precise margins, and repeatable results across multiple venues. By integrating large-format banner production workflow considerations with practical packaging and logistics, these banners become strategic assets rather than disposable pieces, capable of traveling well and maintaining legibility at a distance even in varying lighting conditions. The approach emphasizes understanding audience intent, environmental constraints, and banner display best practices, so the final display looks sharp under different illuminants and remains durable through transportation, shelf life, and repeated assembly. When teams follow a structured, end-to-end workflow—covering concept to display—campaigns gain repeatable, scalable outcomes that reinforce brand consistency across events and venues.
To convey the same idea using alternative terms, think of it as a retractable banner process, a portable signage production sequence, or a display-ready signage workflow that moves from brief to booth-ready asset. Consider a print-to-display pipeline where artwork, substrate selection, finishing details, and mounting hardware converge to create a durable, transportable banner for busy show floors. These terms align with the same goals of color accuracy, legibility, and fast on-site deployment, while connecting to related topics such as large-format printing, booth design, and on-site display optimization. Understanding these LSIs helps readers and search engines link related concepts, expanding your reach without duplicating language about the core process.
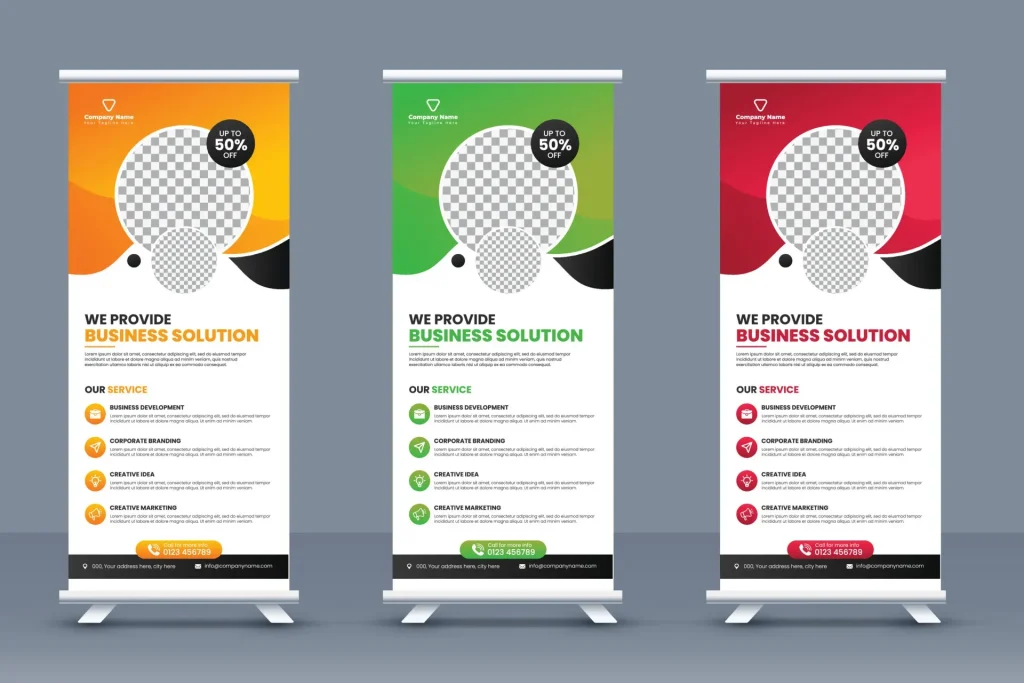
From Concept to Display: The custom roll-up banners workflow
Launching a roll-up banner begins with a clear brief and a mapped journey from an initial idea to a display-ready asset. This concept to display banners path aligns stakeholders across marketing, design, and production to reduce rework and ensure the final banner acts as a strong brand ambassador at events.
Framing the process within the custom roll-up banners workflow helps teams manage timelines, file formats, and color fidelity. It also connects to the roll-up banner design process and the early decisions that shape a print-ready result, ensuring the asset remains cohesive across campaigns.
The Roll-Up Banner Design Process: Crafting Readable, Brand-Driven Layouts
The roll-up banner design process translates strategy into visuals. Focus areas include readability at distance, high-contrast typography, and a clear information hierarchy that guides the viewer through the headline, supporting copy, and call to action.
Designers balance brand guidelines with practical constraints—standard widths, safe margins, and proof-ready files—producing multiple layout options to test with stakeholders. This iterative approach is a natural part of the roll-up banner design process and helps ensure the final design is print-ready and display-ready.
Materials and Printing: Choosing Substrates and The Custom Banner Printing Steps
Materials and printing begin with substrate choices and durability considerations. Substrates like vinyl or PVC-based films with coatings suitable for dye-sublimation or UV inks influence color reproduction and transport ease. In the broader context of the large-format banner production workflow, substrate choice affects life span and performance in varying lighting and environmental conditions.
The core steps of printing—prepress checks, bleed, trim, color management, and RIP-driven output—are the custom banner printing steps that ensure accuracy from file to print. Color calibration and proofs help verify alignment with the design intent before production proceeds.
Proofing and Color Management in Large-Format Banner Production
Proofing and quality assurance ensure the banner looks right in real-world conditions. Soft proofs allow color and composition checks, while hard proofs simulate lighting and viewing distance to confirm legibility.
QA also covers alignment and trim accuracy, rail alignment, bleed completion, and finish uniformity. This step is essential in the large-format banner production workflow and reduces returns by catching issues early.
Finishing, Assembly, and Edge-Case Readiness for Fast Booth Setup
Finishing and assembly wrap up production, including trimming to exact size, lamination for scuff resistance, and mounting hardware preparation for rapid deployment.
Finishing choices—edge coatings, protective laminates, grommets, and rail systems—affect durability and on-site setup speed. Align these options with banner display best practices to maximize performance in booths.
Display Strategy: Placement, Lighting, and Logistics for Maximum Impact
Display strategy covers placement and lighting to maximize impact. Position banners along high-traffic sightlines and avoid obstructions; consider ambient lighting to preserve legibility and color fidelity.
Logistics and packaging protect the print during transit and storage, ensuring consistent brand presentation across events. By planning display logistics in advance, you follow banner display best practices that keep campaigns cohesive from venue to venue.
Frequently Asked Questions
What is the concept to display banners workflow for custom roll-up banners, and how does it begin?
The concept to display banners workflow begins with a clear brief: audience, action, brand colors, typography, exact dimensions, bleed, and safe margins. This foundation guides design, materials, and printing, ensuring a smooth move from concept to display.
How does the roll-up banner design process fit into the custom roll-up banners workflow?
In the design phase, the roll-up banner design process focuses on readability at distance, high-contrast typography, and safe margins. It translates the brief into print-ready art that aligns with brand guidelines within the broader custom roll-up banners workflow.
What are the key steps in the custom banner printing steps within the large-format banner production workflow?
Key steps in the custom banner printing steps include prepress checks, applying bleed and trim, RIP-driven printer instructions, color management, and proofs (soft and hard) before final print, all within the large-format banner production workflow.
Why is proofing important in the custom roll-up banners workflow, and what does it involve?
Proofing validates color accuracy and legibility before production. It involves soft digital proofs and hard physical proofs to verify resolution, logo integrity, and alignment with rails and trim, reducing rework in the custom roll-up banners workflow.
What are banner display best practices to optimize performance during the custom roll-up banners workflow?
Banner display best practices cover strategic placement for high visibility, controlling lighting to minimize glare, using matte finishes, and planning for quick, damage-free setup to maximize in-booth impact.
How do finishing, QA, and logistics contribute to delivering a show-ready banner in the custom roll-up banners workflow?
Finishing ensures precise sizing and mounting readiness; QA checks alignment, trim accuracy, and color consistency; and logistics covers safe packaging and transport. Together, these steps support a durable, show-ready banner within the custom roll-up banners workflow.
| Step | Key Points |
|---|---|
| 1) Concept and Brief | – Solid brief answering: audience, action, brand colors, typography, imagery, exact dimensions, safe margins, and required file formats. – Lays the foundation for visual language; reduces rework; aligns concept to messaging. |
| 2) Design Phase: The Roll-Up Banner Design Process | – Prioritizes readability at a distance, high-contrast typography, and a guided information hierarchy (headline, supporting copy, CTA). – Work within standard banner dimensions and safe margins; translate concept into a brand-aligned composition; iterative layouts and stakeholder feedback. |
| 3) Materials and Printing: Substrate and Steps | – Choose substrate (durable vinyl/PVC) with suitable coatings for dye-sublimation or UV inks; consider eco-friendly options and transport ease. – Printing steps include prepress checks, bleed, trim, safe margins; RIP software, color management, calibration, proofs, and test prints. |
| 4) Proofing and Quality Assurance | – Soft proof (digital) and hard proof (physical) to verify color, resolution, and composition at viewing distance. – Check legibility, logo integrity, and color balance; QA for alignment, trim accuracy, bleed, and finish. |
| 5) Finishing and Assembly | – Trim to size, apply lamination or edge coatings for durability; prepare for rail system installation. – Include hardware options (grommets, magnets); ensure portability, rollability, and re-packability; consider protective laminates and finishes. |
| 6) Proof of Display and Logistics | – Plan for display context: lighting, ambient conditions, and visibility. – Packaging, handling, and storage to protect the print during transit and at the venue. |
| 7) Color Management in Large-Format | – Calibrate monitors and printers, use ICC profiles, and maintain consistency across batches. – Color fidelity reinforces brand integrity in any display scenario. |
| 8) Display Best Practices | – Place banners at high-traffic sightlines, manage glare with matte finishes, and ensure durability for repeated use. – Store rolled prints correctly; plan replacements to keep campaigns current. |
| 9) Budget, Timeline, and Efficiency | – Define realistic timelines and budgets for multiple versions, proofs, and reprints. – Standardized workflows reduce bottlenecks and ensure consistent brand presentation across events. |
Summary
The HTML table above summarizes the key points of the base content on the custom roll-up banners workflow, translating a comprehensive guide into a concise, scannable format for quick reference.