When comparing iron-on vs sew-on patches, you balance speed, ease, and long-term durability. Iron-on patches advantages include quick setup and a clean, no-stitch look on sturdy fabrics. Sew-on patches benefits come from durable stitching and reliable performance across many washes. If you are testing methods, consider how to apply iron-on patches on a scrap piece before committing to your final item. This quick overview helps you weigh fabric type, design, and care routines to choose the best method.
For a broader understanding, you can describe the choice as heat-activated backing versus sewn-on attachment. In SEO friendly terms, consider adhesive-backed patches, stitched-on patches, and the patch backing options that can influence durability. From an LSI perspective, discussing patch backing, the adjacency of embroidery, and edge finishes helps readers connect related ideas like durability of patches. This approach helps readers relate concepts such as fabric compatibility, care cycles, and reusability without relying on a single term. When prototyping, a hybrid approach: start with a heat-activated option for quick visuals, then reinforce with stitching for lasting wear. By mapping these terms to your project fabric, audience, and washing expectations, you guide informed choices that balance speed and reliability.
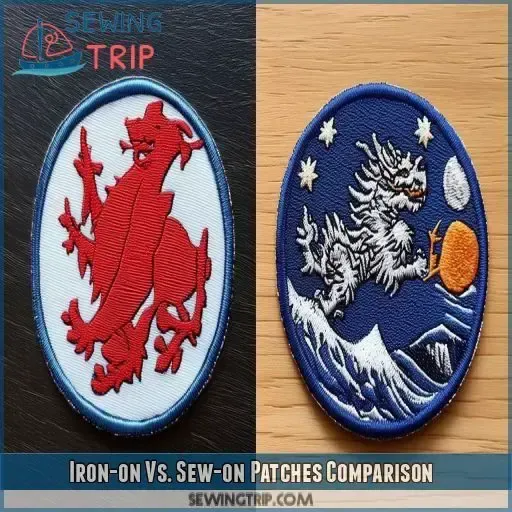
Iron-on vs sew-on patches: a quick contrast to guide your choice
Iron-on patches attach with a heat-activated adhesive, delivering a fast, no-sew option that works best on sturdy fabrics like denim, canvas, and many cotton blends. This method shines when you need to apply multiple patches quickly, or when you’re working with fabrics that tolerate heat well. You’ll often hear about the iron-on patches advantages of speed and ease, especially for prototypes or mock-ups where you want to test a design before committing to stitches.
Sew-on patches, by contrast, rely on stitching to form a durable mechanical bond. They’re favored for long-term wear and frequent washing, making them ideal for workwear, uniforms, or outdoor gear. The sew-on patches benefits include better resilience on fabrics that don’t respond well to heat, as well as more control over alignment and finishing for a professional look. When deciding between options, weigh how the patch will be used, how often it will be laundered, and how much time you can dedicate to the application.
Patch backing options and edge finishes for performance
Backing choices shape both the look and the durability of your patches. Adhesive backings give a quick, clean finish for iron-on applications, but the strength can vary with fabric type and care. Some patches use glue-based adhesives while others rely on a resin or polymer that melts under heat. Understanding patch backing options helps you pick a solution that stays put on the intended surface.
Edge finishes—from a tight zigzag to a dense satin stitch—also influence how well a patch holds up. Sew-on patches benefit from sturdy stitching around the edge, which can prevent fraying and keep the design crisp through many wash cycles. When layering patches or working with slippery fabrics, choosing appropriate backing and edge treatments can significantly extend the life of the patch and its appearance.
How to apply iron-on patches correctly
How to apply iron-on patches starts with a clean, dry surface. For best results, place a cotton cloth between the iron and the patch, then press with steady, even pressure at the fabric’s recommended temperature for 15–30 seconds. This is a good moment to consider the how to apply iron-on patches guidance to ensure full contact and avoid shifting the patch during application.
After heat application, let the patch cool completely and test the edges. If any portion lifts, reapply heat for a longer period or add a few stitches along the perimeter for extra security. Following these steps helps you balance the speed of iron-on application with a durable finish that lasts through wear and washing.
Durability and care: maximizing patch longevity
The durability of patches is influenced by how you apply them and how you care for the material afterward. Iron-on patches can offer strong initial adhesion, but heat exposure and aggressive washing can reduce bond strength over time. To protect the bond, wash garments inside out, use gentler cycles, and avoid high-heat drying when possible. Regularly inspect patches and consider re-sealing them if you notice edge lifting.
Sew-on patches generally tolerate repeated washing better because their bond is mechanical rather than solely adhesive. For best results, ensure sturdy stitching density and use thread that matches the fabric type. If you expect heavy wear, it’s common to reinforce with a patch border or combine iron-on with sewing for added security and longevity.
Fabric and design considerations: choosing the right patch for your material
Fabric type heavily guides patch choice. Cottons and denims typically respond well to iron-on patches when you follow recommended heat times, while stretch fabrics, knits, or delicate textiles like silk may not hold heat reliably and can distort under heat. In these cases, sew-on patches are often the safer option to preserve fabric integrity.
Design and backing details also matter. Layering patches, complex shapes, or fabrics with nap or pile can shift during application, so alignment aids and appropriate backing choices help maintain a professional look. Whether you’re aiming for a clean, no-sew appearance or a durable, stitched finish, the design decisions influence how it wears over time.
Practical tips and real-world recommendations: when to choose iron-on vs sew-on patches
In real-world projects, many crafters start with iron-on patches to get a quick look or prototype a concept, then add sewing to reinforce high-use areas. This practical approach leverages the iron-on patches advantages for rapid results while leveraging sew-on patches benefits for durability where it matters most. Testing on a scrap piece of the same fabric can reveal how the patches will behave under washing and movement.
If you’re unsure, a hybrid strategy often delivers the best balance. Use iron-on patches for initial placement and design revision, then reinforce with a few secure stitches along the edges. This helps ensure a robust finish without sacrificing speed for the bulk of your project.
Frequently Asked Questions
What are the iron-on patches advantages versus sew-on patches benefits?
Iron-on patches advantages include fast, no-sew application and a clean look on sturdy fabrics like denim or canvas, making them ideal for quick customization or prototypes. Sew-on patches benefits come from their sewn durability, better performance on fabrics prone to heat distortion, and superior washability for items that endure heavy wear. For long-lasting results, many projects benefit from selecting the approach that best matches the fabric and usage, or combining both methods.
How to apply iron-on patches and when to choose sew-on patches?
How to apply iron-on patches: start with a clean, dry surface; place the patch; cover with a cloth; press with a hot iron for 15–30 seconds, using steady pressure; let cool and test edge. Choose sew-on patches when the fabric is heat-sensitive, when you need enhanced durability, or for items that will go through frequent washing, since stitching provides a more reliable bond over time.
What factors affect the durability of patches when using iron-on patches vs sew-on patches?
Durability depends on fabric type, heat exposure, wash cycles, and backing quality. Iron-on patches rely on a heat-activated adhesive that can weaken with stretching, moisture, or high heat, while sew-on patches rely on stitching for a mechanical bond that generally holds up better under washing and heavy wear. Consider the fabric and expected care routine when choosing.
Patch backing options for iron-on vs sew-on patches: which should you choose?
Iron-on patches use a heat-activated adhesive backing, whereas sew-on patches typically have a fabric backing with a ready-to-sew edge. Some patches use glue-based adhesives that melt with heat, while others use resin or polymer backings. The backing option affects alignment, flexibility, and durability, so pick based on fabric type and project needs.
Do iron-on patches advantages apply to all fabrics, or should you use sew-on patches benefits for delicate materials?
Iron-on patches work well on cottons, denim, and canvas, aligning with their advantages. Delicate materials, stretch fabrics, and knits can distort or lift with heat, making sew-on patches benefits more reliable for those textiles and for items that see regular wear or washing.
Can you combine iron-on patches and sew-on patches for a durable finish?
Yes. A hybrid approach can give the quick look of iron-on patches with the durability of sew-on stitching. Start with iron-on for speed and then reinforce critical areas with sewing, especially along edges or seams. Test on scrap fabric first and allow full curing before regular use.
| Aspect | Iron-on patches | Sew-on patches |
|---|---|---|
| What they are | Heat-activated adhesive backing bonds to fabric when heated with an iron. | Stitched to fabric using needle and thread; no heat. |
| Application method | Press with an iron at an appropriate temperature for 15–30 seconds; may reposition while warm. | Sew around the patch edge with compatible thread; can use zigzag or satin stitch. |
| Durability | Bond can weaken with improper heat, moisture, or care; effectiveness varies by fabric. | Generally more durable over time, especially with frequent washing. |
| Best fabrics | Denim, canvas, and most cotton blends; may be less reliable on delicate or very stretchy fabrics. | Versatile across many fabrics; good for heat-sensitive textiles. |
| Care after application | Follow garment care; avoid high heat after application; reheat or reattach if bonding weakens. | Wash and dry as usual; stitches help maintain bond through cycles. |
| Backings & edges | Glue-based or heat-activated adhesive backing; edges may fuse to fabric. | Fabric backing with stitching; edges finished by sewing for a clean look. |
| Cost & availability | Widely available; often cheaper for quick customization and large batches. | Widely available; stitching adds cost but often yields greater longevity. |
| Choosing the right option | Best for speed, easy application on heat-tolerant fabrics; suitable for mock-ups and rapid results. | Best for durability, frequent washing, and heavy wear; consider sewing for reinforcement when needed. |
| Real-world use cases | Quick-look projects, prototypes, or items on sturdy fabrics where speed matters. | Workwear, uniforms, outdoor gear, or items subjected to heavy use and washing. |
| Troubleshooting common issues | Patches not sticking: re-press with longer heat/pressure; ensure fabric is dry; adhesive compatibility. | Edges lifting: reseal with heat or add edge stitching for security. |
Summary
Iron-on vs sew-on patches offer different benefits, and the best choice depends on your fabric, usage, and care preferences. Iron-on patches provide speed and a clean no-sew look, especially on sturdy fabrics that tolerate heat, while sew-on patches deliver superior durability and washability for items that go through frequent wear. By understanding the strengths of each method and testing on your fabric, you can achieve a professional, durable patch that enhances your project’s style and longevity. If you’re unsure, start with iron-on patches for quick results and reinforce with sewing for high-use areas. With thoughtful selection, you’ll enjoy patches that look great and stand up to everyday wear, reflecting your design intent and branding.