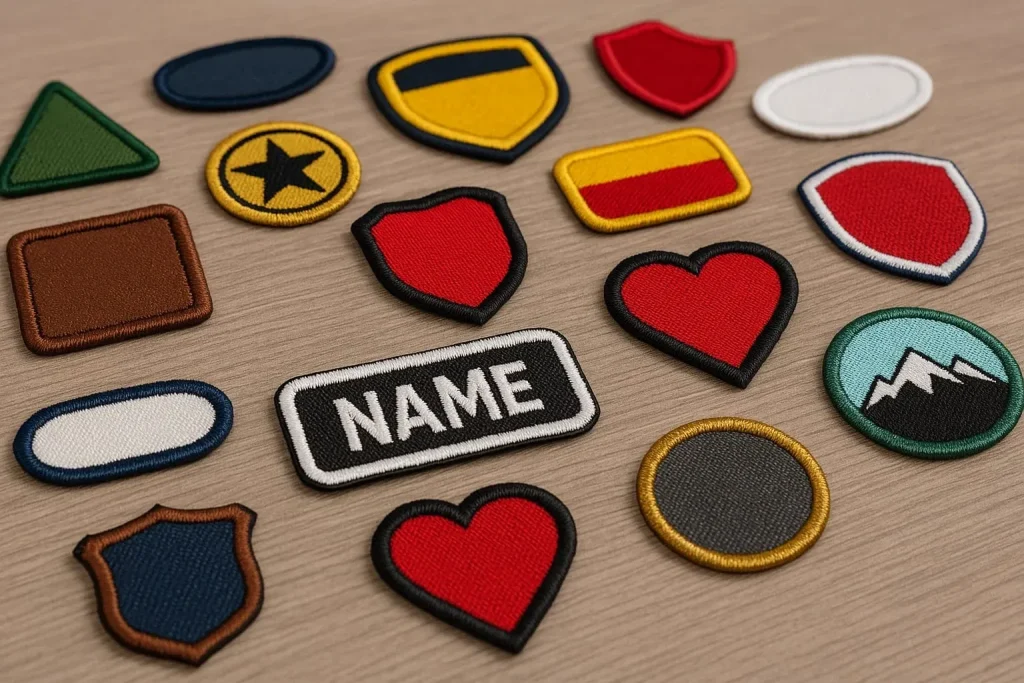
Patches have a long, storied history as a simple way to decorate textiles and signal belonging or achievements, tracing their roots from military insignia to backpacks, denim jackets, and fashion runways, where small stitched emblems can convey culture, allegiance, personal milestones, and memories at a glance, turning ordinary garments into portable stories that users carry with pride. Today, patches still serve that same purpose—adding personality to jackets, bags, hats, and uniforms—while also offering practical uses like repairing small rips or covering wear, and they can be swapped or layered to reflect evolving interests, teams, or brand campaigns, making them versatile additions to any wardrobe. This definitive guide covers iron-on patches, sew-on patches, and custom patches, providing clear criteria for choosing, applying, and maintaining them so they look great and last longer; it also includes a dedicated patch application guide to walk you through the nuances of fabrics, heat settings, backing types, border styles, and stitching approaches. To keep patches vibrant and secure, you’ll find patch care tips woven into the guidance, from selecting the right backing and adhesive strength to washing approaches that minimize fraying, testing adhesion periodically, and applying finishing stitches that protect both patch and garment over years of use. Whether you’re upgrading a uniform, personalizing a bag, or launching a small brand line, patches offer a flexible vocabulary of symbols and textures that lets wearers express identity while enjoying durable, easy-to-maintain embellishments.
In broader terms, these textile embellishments—textile adornments, badges, emblems, or decorative motifs—attach to fabric to signal affiliation, style, or achievement, turning simple garments into personal statements. From fashion branding to club insignia, these patches come in multiple formats, backings, and production methods, connecting design intent with wearability and longevity. Together with practical notes on backing options, embroidery technique, and care routines, the topic maps neatly onto related ideas in apparel manufacture and styling, helping readers approach customization with both creativity and care.
Understanding Iron-On Patches: Quick Applications and Limitations
Iron-on patches are fabric motifs backed with a heat-activated adhesive. They provide a fast path to personalization on sturdy fabrics like denim, canvas, and polyester blends, using a straightforward patch application guide for best results.
While they’re quick and beginner-friendly, iron-on patches rely on proper heat settings and fabric compatibility. Some patches may peel with repeated washing or on slick textures, so consider combining with stitching or opting for sew-on alternatives when durability is a priority.
Sew-On Patches: Durability and Longevity for Recurrent Washes
Sew-on patches achieve superior long-term durability by requiring stitches around the edge. They work on nearly any fabric, including delicate textiles that don’t tolerate heat and heavy-duty materials that endure frequent wash cycles.
Because they rely on thread rather than adhesive, sew-on patches are ideal for items like jackets, bags, and uniforms. Baste first, choose a sturdy stitch, and finish securely to maximize longevity across many wear-and-wash cycles.
Custom Patches: Designing Your Unique Brand Identity
Custom patches let you define every detail—shape, size, color palette, border style, and embroidery style—offering a distinctive identity for clubs, schools, brands, or personal projects. They can be created as iron-on, sew-on, or a combination of both to fit your fabric and use case.
The production process includes concept development, proofs, and final production. Work with a patch maker to choose backing, merrow edge or laser-cut borders, and color-matched threads so your patches align with your branding across fabrics.
Patch Application Guide: Iron-On and Sew-On Protocols for Best Results
A thorough patch application guide covers how to prepare fabrics, position patches, and apply heat or stitches for reliable adhesion. For iron-on patches, start with a clean, prewashed surface and a protective pressing cloth, then heat-set at the recommended temperature with firm, even pressure.
For sew-on patches, baste the patch in place, then stitch around the edge using a consistent stitch length. Finish with secure knots and trim loose threads. Always test on a scrap fabric or similar material to confirm durability before committing to your garment.
Choosing the Right Patch for Fabric and Use: Denim, Bags, and Uniforms
Selecting the right patch type depends on fabric, wear, and care routines. Iron-on patches provide quick decoration on durable fabrics like denim and canvas, while sew-on patches offer superior endurance on bags, hats, and uniforms that undergo frequent washing.
For a distinctive, branded look, consider custom patches with reinforced backings and a merrow or laser-cut border. Evaluate backing adhesives, thread color, and patch size to ensure the final design complements garments, accessories, and team gear.
Caring for Patches: Longevity Tips and Common Care Tips
To extend patch life, follow general patch care tips: wash inside out on gentle cycles, use cold water, and select mild detergents to minimize color bleed and edge fraying. Avoid harsh scrubbing that can damage embroidery and backing adhesives.
If edges begin to peel, re-sewing or re-pressing with a patch application guide can restore security. Regularly inspect patches for curling or loose threads, and consider re-stitching or reinforcing with a light perimeter stitch for added durability.
Frequently Asked Questions
What are the main differences between iron-on patches and sew-on patches, and when should you use each?
Iron-on patches use a heat-activated backing for quick, beginner-friendly attachment on sturdy fabrics, but they can peel with frequent washing or on slick materials. Sew-on patches require stitching and are highly durable across many washes, suitable for delicate fabrics or items you want to last for years. For speed and easy application, iron-on is great; for long-lasting wear, choose sew-on patches. Custom patches can be ordered with either backing option.
What is the basic patch application guide for applying iron-on patches to different fabrics?
Patch application guide: 1) wash and dry the garment to remove sizing and create a clean surface; 2) position the patch where you want it; 3) place a pressing cloth over the patch; 4) set the iron to the recommended temperature and press firmly for 15–30 seconds without moving; 5) check adhesion and re-press if needed; 6) allow to cool and gently tug to test. Be mindful of fabric compatibility, and consider turning the garment inside out for washing later.
How can I use custom patches for branding or personal style, and what backing options should I consider?
Custom patches are tailored designs that can be iron-on, sew-on, or a combination. They let you control embroidery style, backing, border shape, and color. For quick branding on sturdy fabrics, choose iron-on backing; for durability or heat-sensitive fabrics, sew-on backing is preferable. Consider merrow or laser-cut borders and test proofs on similar fabrics before production.
What are essential patch care tips to keep both iron-on patches and sew-on patches looking their best?
Patch care tips include washing patches inside out on gentle cycles, air-drying when possible, and avoiding harsh detergents that can fade colors. Reinforce edges if the patch experiences abrasion, and keep patches away from high heat when not required. Regular inspection and light resewing or re-pressing can extend patch life.
What common issues happen with patches in washing and wear, and how can I troubleshoot peeling or curling?
Common issues include peeling edges with iron-on patches, loose stitching on sew-on patches, and patches curling after washing. Troubleshoot by ensuring correct heat time and fabric compatibility, re-pressing or re-sewing as needed, and considering an additional perimeter stitch for durability. Following patch care tips can also reduce these problems.
Where is the best patch placement on jackets, bags, or hats according to a patch application guide?
Placement affects visibility and durability. Typical spots include the left chest on jackets, the upper sleeve, or on bags and hats. For larger patches, balance with smaller pieces or keep a single focal patch. Consider garment lines and textures for seamless integration, and consult a patch application guide when planning complex layouts.
| Topic | Key Points |
|---|---|
| What are patches? | Small fabric motifs (often embroidered) attached to clothing or gear; used to decorate, signal belonging or achievements; come in iron-on, sew-on, and custom types. |
| Types of patches | Iron-On patches: heat-activated backing; quick and beginner-friendly; best on sturdy fabrics; watch heat settings and washing. Sew-On patches: durable, work on almost any fabric; ideal for delicate items or long-lasting use. Custom patches: tailored designs (iron-on, sew-on, or both) for brands, clubs, schools, or personal projects. |
| Choosing the right patch | Consider fabric type, use, and maintenance. Iron-On for quick decoration on sturdy garments; Sew-On for heavy wear or delicate fabrics; Custom for a unique identity. |
| Materials and backings | Embroidery threads (polyester or rayon) for colorfast results; backings range from heat-activated glue to sew-on fabric; impact on durability and finish. Start with simple designs and fabrics. |
| Designing and producing custom patches | Steps: concept, size/shape, color/detail, backing and border, production and proofs; test on similar fabric before full production. |
| Applying iron-on patches | Prep garment (wash/dry and flatten); position the patch; cover with a cloth; apply heat 15–30 seconds; check adhesion and reheat if needed; cool and test. |
| Tips for iron-on patches | Not all fabrics bond well; some patches need a second heat press for thicker fabrics; wash inside out to extend life. |
| Applying sew-on patches | Gather supplies; position and baste; stitch around the edge (running, whip, or small blanket stitch); finish and trim; reinforce as needed. |
| Sew-On patch maintenance | Launder gently, air-dry if possible; use gentle cycles; avoid pulling on the patch. |
| Patch placement and aesthetics | Placement affects visibility and durability (e.g., left chest, sleeves, bags). Balance large patches with smaller ones; consider scaling and garment lines. |
| Caring for patches | Clean gently; reinforce edges if worn; wash inside-out; cold water and mild detergents for bright colors. |
| Common issues and troubleshooting | Peeling edges (reheat or sew around edges); loose stitching (re-stitch); curling (ensure edges are well-stitched or backing lies flat when washing). |
| Where to get patches and how to use them | From hobbyists to manufacturers; DIY blanks or professional custom patches for branding or personal style; match patch choice to fabric, washing, and longevity. |
| DIY vs professional patches | DIY patches are cost-effective for small runs; professionals provide higher embroidery quality, color consistency, and durable backings at scale; request proofs and samples to verify appearance. |
| Patch trends and fashion ideas | Trends include minimalist accents, bold colorful patches, themed clusters, and eco-conscious options using sustainable threads and ethical production. |
Summary
Patches are a versatile way to personalize clothing and gear, offering both decorative flair and practical durability. Whether you choose iron-on, sew-on, or custom patches, you can express identity, branding, or personal style while extending the life of garments. Start by matching patch type to fabric and care routines, designing or selecting a backing and border, then following proper application steps. With proper care—gentle washing, heat-aware fabrics, and occasional reinforcement—patches can remain vibrant and secure for years. DIY patches empower creativity, while professional patches ensure consistent quality at scale, making patches a timeless tool for fashion and branding.